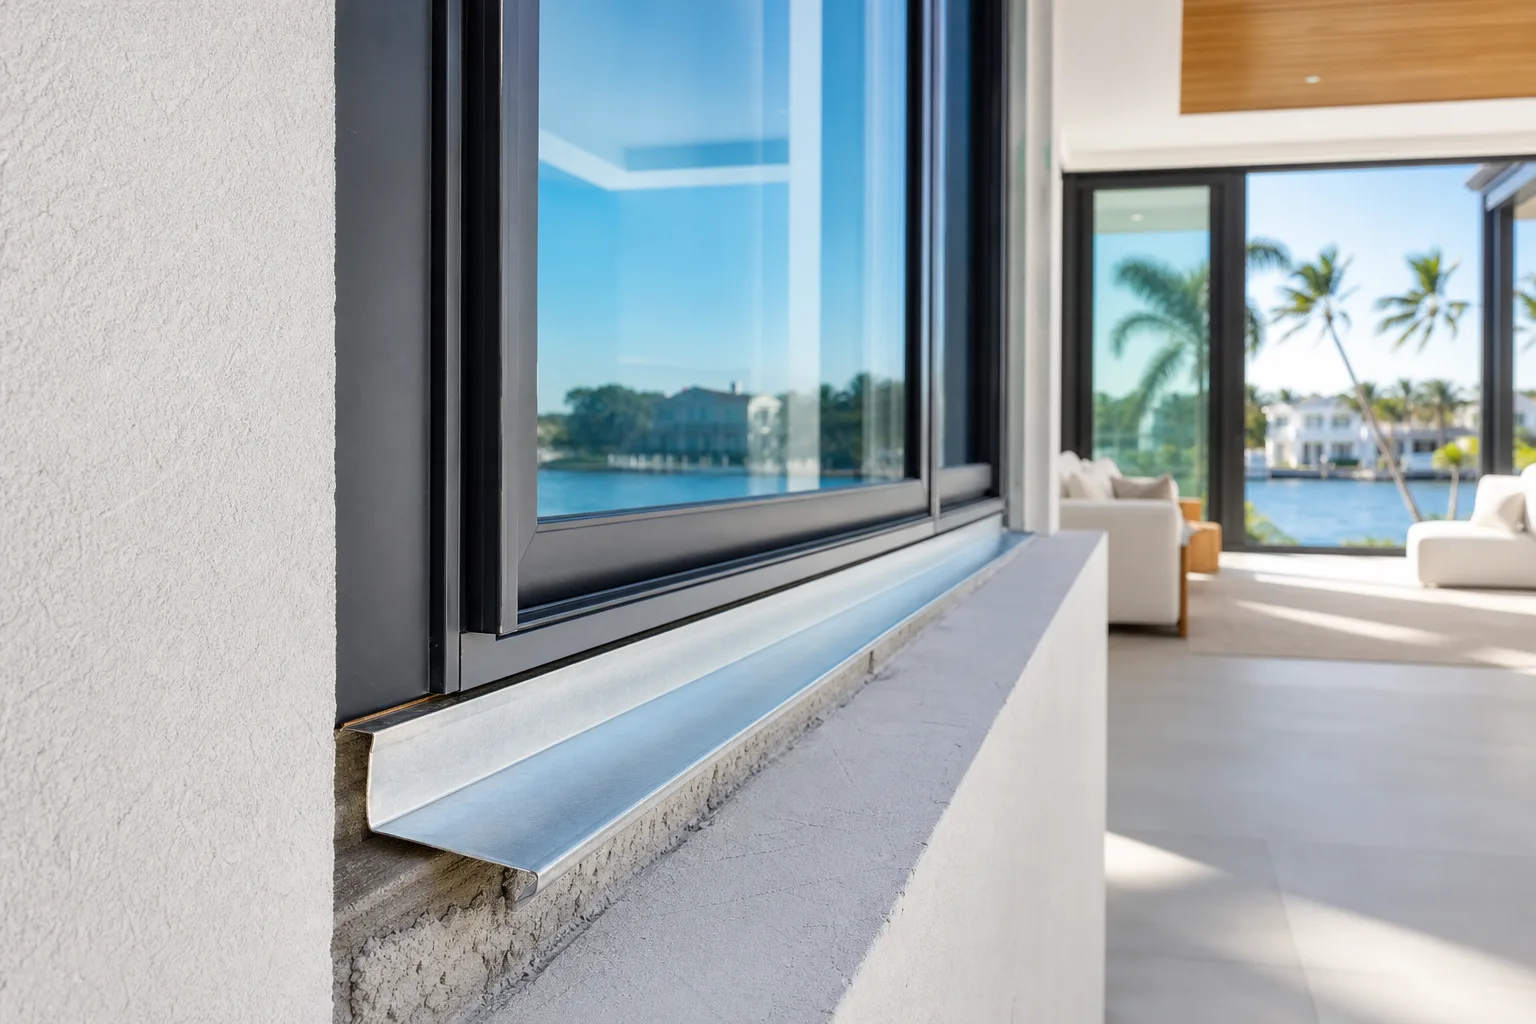
TL;DR: A sill pan is a sloped drainage layer installed at the bottom of a rough opening before a window frame is set. It redirects water that bypasses the frame to the exterior rather than into the wall cavity. For South Florida homes, especially during the Atlantic hurricane season that runs June 1 through November 30, a correctly installed sill pan is a baseline water management detail, not an optional upgrade.
What You Need
Before you can evaluate whether a sill pan is correct, gather the following:
- Access to the rough opening before or during window installation
- The window manufacturer's installation instructions (required for Florida Product Approval compliance)
- Your project's permit drawings or shop drawings, which should note flashing requirements
- Basic knowledge of your wall assembly: stucco over concrete block (CBS) versus frame construction behave differently
If you have not yet scheduled your project, reviewing the window replacement process first will give you useful context.
Step 1: Understand What a Sill Pan Actually Is
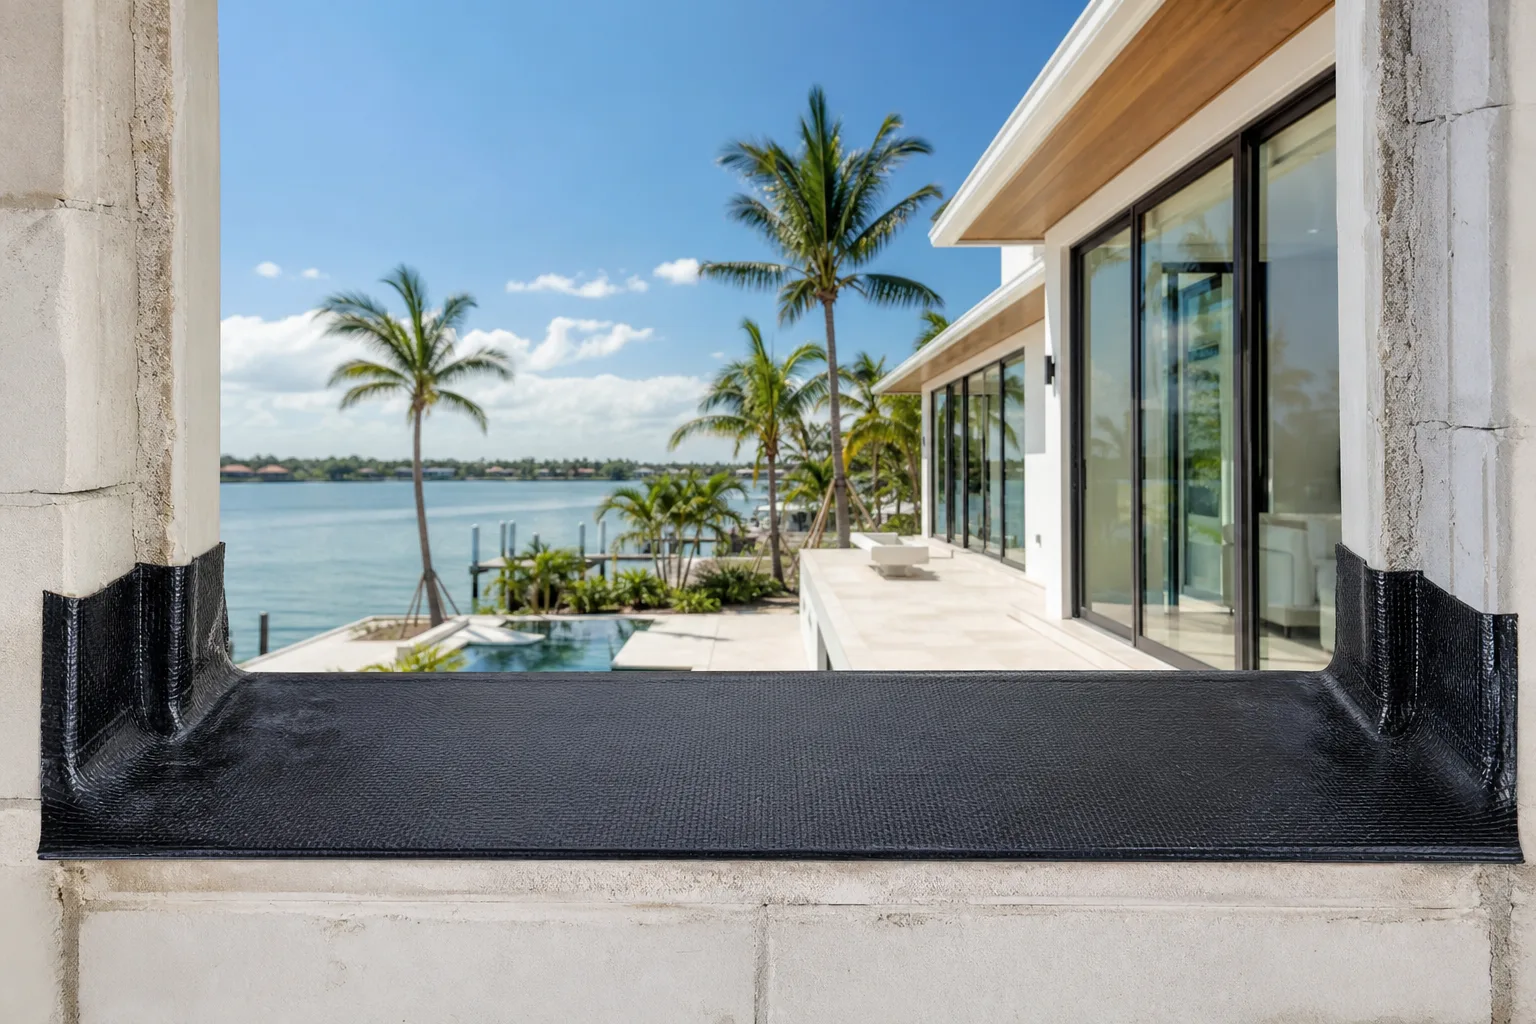
A sill pan sits at the bottom of the rough opening, below the window frame. Think of it as a shallow tray with a forward slope and an exit point at the exterior face of the wall.
Its job is drainage by design. Even a correctly installed, fully flashed impact window can admit a small amount of water around the frame during a wind-driven rain event. The sill pan intercepts that water before it reaches the rough sill framing or the interior wall assembly.
Sill pans can be formed from several materials. Flexible self-adhering flashing membrane, rigid pre-formed pan flashing (often PVC or aluminum), and site-built sheet metal pans are the most common. The right choice depends on your wall type, the rough opening dimensions, and what the window manufacturer's installation instructions specify.
Step 2: Know Why South Florida Conditions Make This Detail Critical
South Florida's climate creates three conditions that stress window openings more than most U.S. regions:
- Wind-driven rain pressure. During a named storm, rain is not falling vertically. It is being driven horizontally against the wall at speed. That pressure can push water into gaps that would never leak under normal rain.
- High ambient humidity. Even without a storm, condensation and humidity infiltration can accumulate at the sill over years if there is no drainage path.
- Thermal movement. Aluminum frames expand and contract significantly in Florida heat. That movement works sealants and butyl tape over time, eventually creating small gaps.
For impact window projects specifically, the Florida Product Approval system requires that installations follow the manufacturer's tested installation instructions. Those instructions almost always include sill pan or sill flashing requirements. Skipping that step may not just cause a leak. It may affect the tested assembly and, by extension, the permit sign-off. See 6 things you need to know before you install hurricane impact windows for related code context.
Step 3: Identify the Three Components of a Correctly Installed Sill Pan
Not all sill pan details are identical, but a functional installation shares three features:
Slope toward the exterior. The pan surface should pitch away from the interior, typically a minimum of 1/8 inch per foot, so water flows outward and cannot pond against the frame.
End dams. The sides of the pan must be turned up or sealed to prevent water from running sideways off the pan and into the wall framing at the jamb corners. This is where many field-built details fail.
A clear drainage exit. Water that collects on the pan needs a path out. In a stucco-over-block wall this typically means weep holes or a gap at the exterior face. In a frame wall it means the pan drains over the sheathing and water-resistive barrier to the exterior.
Compare impact-window options for your project. Request a free estimate
Step 4: Verify the Sill Pan Before the Frame Is Set
The sill pan must be inspected and complete before the window frame is installed. Once the frame is in and anchored, you cannot access or correct the pan without removing the window.
A practical field check:
- Look at the pan surface and confirm it slopes outward, not flat or inward.
- Inspect both corners where the pan meets the jamb. End dams should be visible, lapped, and either sealed or mechanically integrated.
- Check that the pan material is bonded continuously to the rough sill with no bridged gaps or fish-mouths in the membrane.
- If it is a frame wall, confirm the pan laps over, not under, the water-resistive barrier on the exterior face of the sheathing.
- Photograph the completed pan before the window is set. This is useful documentation if a water intrusion dispute arises later.
For more on reviewing documentation before approving work, see 9 details to review before approving window shop drawings.
Step 5: Understand How the Sill Pan Relates to the Rest of the Flashing System
A sill pan is one layer in a sequence. It works with, not instead of, the other water management details:
- Head flashing above the window deflects water away from the top of the frame.
- Jamb flashing at the sides integrates the frame with the wall assembly.
- Sealant joints at the perimeter of the frame are the first line of defense; the sill pan is the backup.
Think of it as a belt-and-suspenders system. The sealant keeps most water out. The sill pan handles the water that gets past the sealant anyway. Both are necessary.
In a concrete block and stucco wall assembly, which is common across Palm Beach, Broward, and Miami-Dade counties, the flashing sequence interacts with the stucco stop and weep screed details at the base of the wall. Your installer should be able to describe how those elements connect.
Common Mistakes
Installing the pan flat. A flat pan will hold standing water against the frame and the rough sill. Over time this causes wood rot in frame walls and corrosion in the metal substrate of the frame.
Skipping end dams. Without turned-up or sealed ends, water tracks sideways off the pan into the jamb corner and enters the wall. This is a frequent source of interior water staining that appears at the lower corner of a window.
Using the wrong membrane lap direction. In frame construction, if the sill pan membrane is tucked under the water-resistive barrier instead of over it, any water that reaches the sheathing cannot drain past the pan. The lap direction should always shed water like roof shingles, upper layer over lower.
Relying on sealant alone. Sealant degrades in UV light and heat. In South Florida, exposed exterior sealant joints typically need inspection every few years. A sill pan provides drainage even when sealant has begun to fail.
Not photographing the rough opening. If a leak develops two years later, nobody will remember exactly what was done at the sill. Dated photos are the clearest record.
Bottom Line
A sill pan is a short installation step with a disproportionate effect on long-term performance. It costs little to do correctly during a window installation and is expensive to fix after the fact because the window must come out. If you are planning an impact window project in South Florida, ask your contractor specifically how they handle sill pan flashing for your wall type, and ask to see the manufacturer's installation instructions that govern the detail.
For projects where you want those details reviewed before work begins, request an estimate or contact the team directly to discuss your wall assembly and opening conditions.
Compare impact-window options for your project.
Request a written estimate that identifies the quoted assembly, opening, design pressure, product approval, exposure, installation scope, and applicable project requirements.
Frequently asked questions
Is a sill pan required by Florida building code for impact window installations?
Florida's building code references manufacturer installation instructions as part of the Product Approval system. Most impact window manufacturers require sill flashing or a sill pan in their tested installation method, which makes it effectively a code requirement for those products. Your permit drawings should reflect what the manufacturer specifies.
Can a sill pan be added after an impact window is already installed?
Not without removing the window frame. The pan must be in place before the frame is set and anchored. If water intrusion is occurring at an existing window and there is no sill pan, the practical remediation options are limited to resealing from the exterior or, in more serious cases, removing and reinstalling the window with correct flashing.
What is the difference between a sill pan and a sill extension?
A sill pan is a waterproofing and drainage component inside the rough opening, below the frame, designed to redirect water to the exterior. A sill extension is a finish trim piece added to the interior face of the sill to cover the gap between the window frame and the finished wall surface. They serve completely different purposes and are not interchangeable.
Does the sill pan material matter for concrete block versus frame construction?
Yes. In concrete block construction, water management relies more on weep holes and drainage paths through the stucco system, and flexible membrane pans are often integrated differently than in frame walls. In wood or steel frame construction, protecting the sheathing and framing from moisture is the primary concern, so the lap direction relative to the water-resistive barrier is critical. Ask your installer to specify the approach for your exact wall type.